Introduction
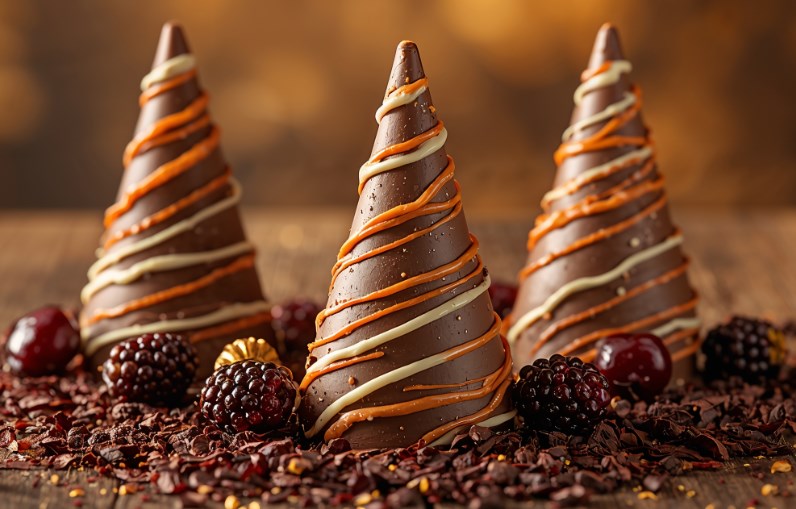
Halloween desserts are all about creativity, and Witch Hat Chocolate Cones are a spellbindingly fun way to celebrate. These whimsical treats use simple ingredients—ice cream cones, cookies, chocolate, and candy—to create edible witch hats that are as charming as they are tasty.
They’re perfect for parties, trick-or-treat snacks, or as a fun activity to make with kids. Not only are they visually stunning, but they’re also delightfully crunchy and chocolatey, making them irresistible for all ages.
Why I Love This Recipe
I love this recipe because it turns everyday pantry staples into something magical. The combination of crispy cone, rich chocolate coating, and playful candy decorations makes every bite satisfying. Plus, the decorating possibilities are endless—whether you want spooky, silly, or glamorous witch hats, you can customize them to your heart’s content.
They’re also no-bake and mess-free, which makes them perfect for when you want something festive without spending hours in the kitchen.
Why It’s a Must-Try Dish
- Festive Fun: Instantly brings Halloween spirit to the table.
- Chocolate Lovers’ Delight: Crisp cone and cookie base coated in smooth chocolate.
- Perfect for Parties: Double as treats and edible décor.
- Kid-Friendly: Fun for children to decorate with candy.
- Quick & Easy: Minimal effort with maximum effect.
Recipe Information
- Preparation Time: 20 minutes
- Cooking/Chilling Time: 30 minutes
- Total Time: 50 minutes
- Servings: 12 witch hats
- Calories per serving: ~210 kcal (approximate)
- Course: Dessert / Snack
- Cuisine: American
Ingredients
- 12 sugar ice cream cones
- 12 chocolate wafer cookies (flat, round)
- 2 cups semi-sweet chocolate chips (or candy melts)
- 1 tbsp vegetable oil (optional, for smoother melting)
- Assorted Halloween candies (candy corn, sprinkles, M&Ms, etc.)
- Colored icing or gel (orange, green, purple for decorating)
Step-by-Step Preparation Method
Step 1: Prepare the Chocolate
- Melt the chocolate chips (or candy melts) in a microwave-safe bowl in 30-second intervals, stirring until smooth.
- Add a little vegetable oil if needed for a glossy, smooth consistency.
Step 2: Assemble the Witch Hats
- Dip the rim of each cone into melted chocolate.
- Press the cone (rim side down) onto a chocolate wafer cookie, forming the pointed hat shape.
- Set aside on a parchment-lined tray.
Step 3: Coat the Cones
- Use a spoon or dip the entire cone into melted chocolate to coat fully.
- Place back onto the parchment tray.
Step 4: Decorate
- While chocolate is still soft, add sprinkles, candy corn, or small candies for decoration.
- Use colored icing to pipe on belt buckles, stars, or spooky details.
- Let the hats set at room temperature or in the refrigerator until firm (about 30 minutes).
How to Serve
- Arrange on a Halloween-themed platter with cobweb decorations.
- Use as edible toppers for cakes or cupcakes.
- Wrap individually in cellophane bags for party favors.
Recipe Tips
- Use candy melts instead of chocolate for brighter, more colorful hats.
- Work in batches so the chocolate doesn’t harden before you decorate.
- For a neater look, place cones on a wire rack while coating in chocolate.
- If you want variety, make some hats “shiny” with smooth chocolate, and others “spooky” with sprinkles.
Variations
- Stuffed Hats: Fill cones with candy (like M&Ms or candy corn) before sealing to surprise guests.
- Colorful Cones: Dip cones in colored candy melts (purple, green, or orange).
- Cookie Base Swap: Use Oreos, graham crackers, or chocolate-dipped shortbread for the brim.
- Glittering Witches: Dust with edible glitter for a magical sparkle.
- Mini Witch Hats: Use mini cones and bite-sized cookies for tiny treats.
Freezing & Storage
- Room Temperature: Store in an airtight container for up to 3–4 days.
- Refrigerator: Keeps up to 1 week, but may sweat when brought to room temp.
- Freezer: Not recommended, as cones can become soggy and lose their crunch.
Special Equipment Needed
- Microwave-safe bowls
- Parchment paper
- Small piping bags (or zip-top bags with tip cut off)
- Wire rack (optional, for neater coating)
FAQ
Q1: Can I make these ahead of time?
Yes—prepare a day or two in advance, but store in an airtight container.
Q2: Can I use white chocolate instead?
Yes! You can tint white chocolate or candy melts with gel food coloring for colorful hats.
Q3: Do I need to temper the chocolate?
Not necessary—using candy melts or chocolate with oil prevents blooming and ensures a shiny finish.
Q4: Can kids help with this recipe?
Absolutely! This is a fantastic kid-friendly recipe, especially for decorating.
Q5: Can I make them gluten-free?
Yes—use gluten-free cones and cookies as the base.
Conclusion
Witch Hat Chocolate Cones are the ultimate Halloween treat—easy to make, endlessly customizable, and guaranteed to delight. They combine simple ingredients with festive creativity, making them the perfect no-bake project for spooky season. Whether you fill them with candy, decorate with sprinkles, or add magical details, these edible hats are sure to cast a sweet spell over your Halloween celebration.
Witch Hat Chocolate Cones
Course: DessertsCuisine: AmericanDifficulty: easy12
servings20
minutes30
minutes50
minutesIngredients
12 sugar ice cream cones
12 chocolate wafer cookies (flat, round)
2 cups semi-sweet chocolate chips (or candy melts)
1 tbsp vegetable oil (optional, for smoother melting)
Assorted Halloween candies (candy corn, sprinkles, M&Ms, etc.)
Colored icing or gel (orange, green, purple for decorating)
Directions
- Step 1: Prepare the Chocolate: Melt the chocolate chips (or candy melts) in a microwave-safe bowl in 30-second intervals, stirring until smooth. Add a little vegetable oil if needed for a glossy, smooth consistency.
- Step 2: Assemble the Witch Hats: Dip the rim of each cone into melted chocolate. Press the cone (rim side down) onto a chocolate wafer cookie, forming the pointed hat shape. Set aside on a parchment-lined tray.
- Step 3: Coat the Cones: Use a spoon or dip the entire cone into melted chocolate to coat fully. Place back onto the parchment tray.
- Step 4: Decorate: While chocolate is still soft, add sprinkles, candy corn, or small candies for decoration. Use colored icing to pipe on belt buckles, stars, or spooky details. Let the hats set at room temperature or in the refrigerator until firm (about 30 minutes).