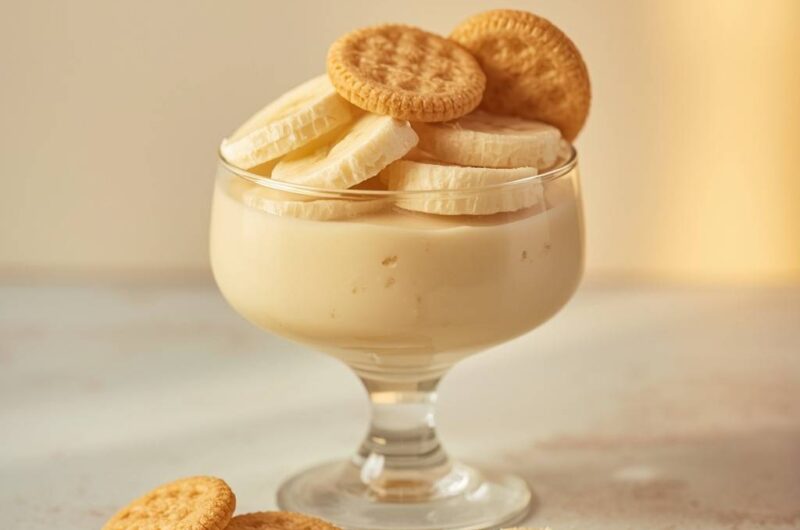
There’s something wonderfully nostalgic and heartwarming about a bowl of Creamy Banana Pudding with Vanilla Wafers. This Southern classic layers luscious homemade vanilla pudding, sweet slices of ripe bananas, and soft, buttery vanilla wafers into a dessert that’s both comforting and elegant.
It’s a dessert that brings back childhood memories, family gatherings, and lazy summer afternoons — sweet, creamy, and impossibly satisfying. Whether served in a big trifle dish or as individual parfaits, it’s the kind of dessert that disappears faster than you can say “seconds, please!”
Why I Love This Recipe
I love this recipe because it’s simple, wholesome, and purely comforting. It takes humble ingredients — milk, eggs, sugar, and bananas — and transforms them into something luxurious and velvety.
The homemade pudding is creamy and rich without being too heavy, and the layers of wafers soak up just enough moisture to become tender, cake-like bites of heaven.
Why It’s a Must-Try Dish
- Timeless comfort dessert loved by all ages.
- Simple ingredients, big flavor — no fancy tools required.
- The contrast of textures (creamy, soft, and slightly crisp) is irresistible.
- Perfect make-ahead dessert — tastes even better after chilling overnight.
- A great way to use up ripe bananas!
This banana pudding is proof that you don’t need complicated recipes to make something truly special.
Recipe Time & Yield
- Preparation Time: 20 minutes
- Cooking Time: 15 minutes
- Chilling Time: 2 hours
- Total Time: 2 hours 35 minutes
- Servings: 8 servings
- Calories: ~350 kcal per serving
Cuisine & Course
- Cuisine: Southern American
- Course: Dessert
Ingredients
For the Homemade Vanilla Pudding:
- 3 cups (720 ml) whole milk
- ¾ cup (150 g) granulated sugar
- 3 tbsp cornstarch
- ¼ tsp salt
- 3 large egg yolks
- 2 tbsp unsalted butter
- 2 tsp pure vanilla extract
For the Layers:
- 4–5 ripe bananas, sliced
- 1 (11 oz / 300 g) box vanilla wafers (about 45–50 wafers)
For Topping (Optional but recommended):
- 1 cup heavy whipping cream
- 2 tbsp powdered sugar
- ½ tsp vanilla extract
Simple Cooking Directions
- Make a creamy vanilla pudding from scratch.
- Layer vanilla wafers, banana slices, and pudding in a dish.
- Chill for at least 2 hours to set.
- Top with whipped cream before serving.
Step-by-Step Recipe Preparation
Step 1: Make the Vanilla Pudding
- In a saucepan, whisk together sugar, cornstarch, and salt.
- Gradually whisk in the milk, ensuring no lumps remain.
- Cook over medium heat, stirring constantly, until the mixture thickens (about 6–8 minutes).
- In a small bowl, whisk egg yolks. Slowly pour ½ cup of the hot milk mixture into the yolks, whisking constantly (to temper them).
- Pour the yolk mixture back into the saucepan and cook for another 2 minutes until smooth and thick.
- Remove from heat and stir in butter and vanilla extract.
- Let the pudding cool slightly for about 10 minutes, stirring occasionally.
Step 2: Layer the Pudding
- In a trifle dish, glass bowl, or 9×13-inch dish, layer as follows:
- A layer of vanilla wafers
- A layer of banana slices
- A layer of warm pudding
- Repeat the layers until all ingredients are used, ending with pudding on top.
Step 3: Chill
- Cover with plastic wrap (press it directly onto the pudding to prevent skin from forming).
- Chill in the refrigerator for at least 2 hours, or overnight for best flavor and texture.
Step 4: Make the Whipped Cream (Optional)
- In a cold mixing bowl, beat heavy cream, powdered sugar, and vanilla extract until soft peaks form.
- Spread or pipe the whipped cream over the chilled pudding.
Step 5: Serve
- Garnish with crushed vanilla wafers, banana slices, or a sprinkle of cinnamon just before serving.
- Serve cold and enjoy the creamy layers!
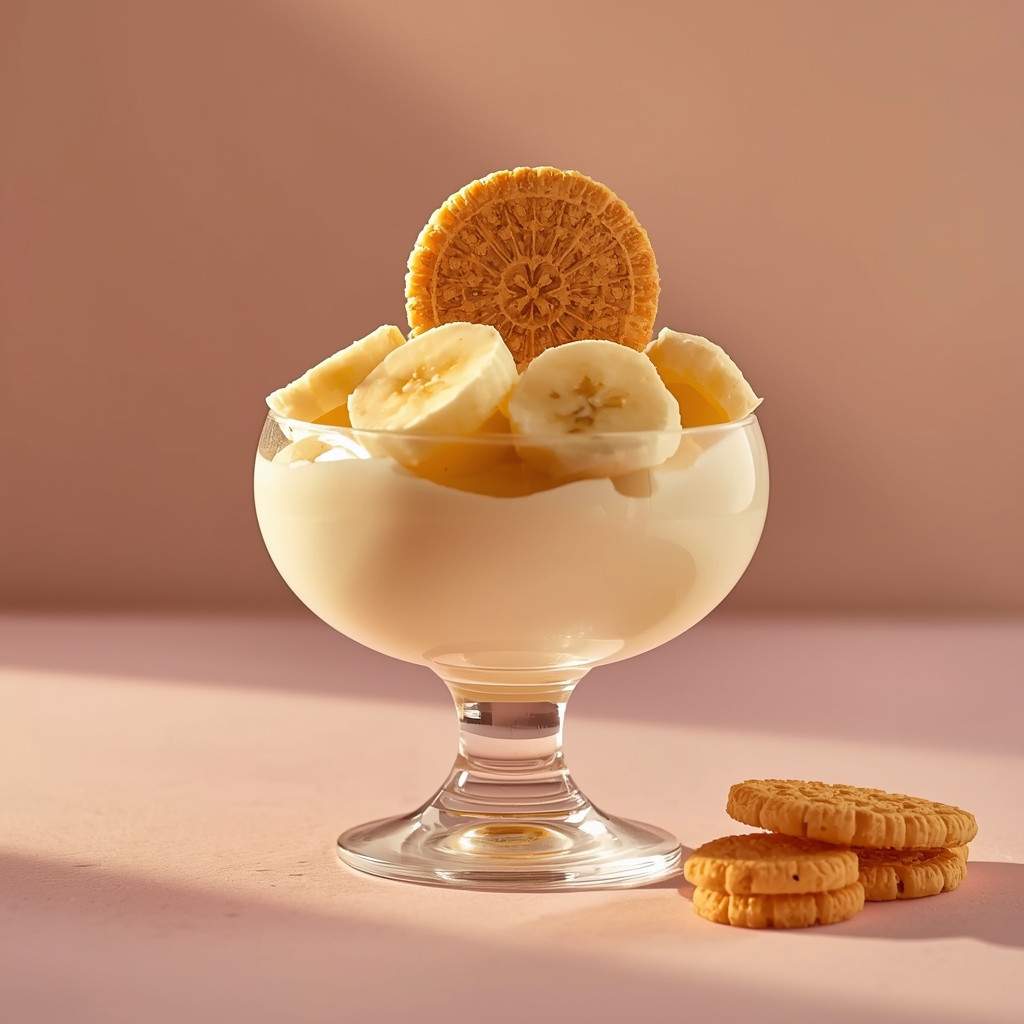
How to Serve
- Serve chilled in glass bowls, mason jars, or a large trifle dish for a beautiful presentation.
- Garnish with extra wafers and banana slices right before serving (to prevent browning).
- For an extra treat, drizzle lightly with caramel sauce or melted white chocolate.
Additional Recipe Tips
- Use ripe but firm bananas — overly soft ones can make the layers mushy.
- If you’re short on time, you can use instant vanilla pudding mix — but homemade tastes richer!
- To prevent banana browning, toss the slices in a few drops of lemon juice before layering.
- Chill overnight for the best flavor and texture — it lets the wafers soften just right.
- Use a clear glass dish if you want to show off the beautiful layers.
Variations
- Chocolate Banana Pudding:
Add ¼ cup cocoa powder to the pudding for a chocolatey twist. - Peanut Butter Banana Pudding:
Whisk 2 tbsp peanut butter into the warm pudding before layering. - Toasted Coconut Banana Pudding:
Add a layer of toasted coconut flakes between the pudding layers. - Nilla Banana Trifle Cups:
Make individual servings in small jars or glasses for parties. - Meringue Topping (Classic Southern Style):
Replace whipped cream with toasted meringue for an old-fashioned finish.
Freezing and Storage
Refrigeration:
- Store covered in the refrigerator for up to 3 days.
- The wafers will soften beautifully, but bananas may darken slightly after 48 hours.
Freezing:
- Not ideal for freezing — the texture of the bananas and pudding can change.
- If you must freeze, use only pudding and wafers (add bananas after thawing).
Special Equipment Needed
- Medium saucepan
- Whisk
- Mixing bowls
- Electric hand mixer or stand mixer (for whipped cream)
- Trifle dish or 9×13-inch baking dish
- Plastic wrap
Frequently Asked Questions (FAQ)
Q1: Can I use boxed pudding mix instead of homemade?
Yes! Use 2 small boxes of instant vanilla pudding mixed with 4 cups milk for a quicker version.
Q2: How do I keep the bananas from turning brown?
Lightly coat the slices in lemon juice or orange juice before layering.
Q3: Can I make this dessert a day ahead?
Absolutely — in fact, it tastes even better the next day as the flavors meld!
Q4: Can I use another type of cookie instead of vanilla wafers?
Yes — try graham crackers, shortbread cookies, or ladyfingers.
Q5: Why did my pudding turn runny?
It may not have cooked long enough to thicken. Be sure to cook it until it coats the back of a spoon.
Conclusion
Creamy Banana Pudding with Vanilla Wafers is the definition of a classic comfort dessert — smooth, sweet, and full of nostalgic Southern charm. Each spoonful offers a perfect mix of creamy pudding, soft banana, and tender wafers that melt in your mouth.
Creamy Banana Pudding with Vanilla Wafers
Course: DessertsCuisine: AmericanDifficulty: Easy8
servings20
minutes2
hours15
minutes2
hours35
minutesIngredients
For the Homemade Vanilla Pudding:
3 cups (720 ml) whole milk
¾ cup (150 g) granulated sugar
3 tbsp cornstarch
¼ tsp salt
3 large egg yolks
2 tbsp unsalted butter
2 tsp pure vanilla extract
For the Layers:
4–5 ripe bananas, sliced
1 (11 oz / 300 g) box vanilla wafers (about 45–50 wafers)
For Topping (Optional but recommended):
1 cup heavy whipping cream
2 tbsp powdered sugar
½ tsp vanilla extract
Directions
- Step 1: Make the Vanilla Pudding : In a saucepan, whisk together sugar, cornstarch, and salt. Gradually whisk in the milk, ensuring no lumps remain. Cook over medium heat, stirring constantly, until the mixture thickens (about 6–8 minutes). In a small bowl, whisk egg yolks. Slowly pour ½ cup of the hot milk mixture into the yolks, whisking constantly (to temper them). Pour the yolk mixture back into the saucepan and cook for another 2 minutes until smooth and thick. Remove from heat and stir in butter and vanilla extract. Let the pudding cool slightly for about 10 minutes, stirring occasionally.
- Step 2: Layer the Pudding : In a trifle dish, glass bowl, or 9×13-inch dish, layer as follows: A layer of vanilla wafers A layer of banana slices A layer of warm pudding Repeat the layers until all ingredients are used, ending with pudding on top.
- Step 3: Chill : Cover with plastic wrap (press it directly onto the pudding to prevent skin from forming). Chill in the refrigerator for at least 2 hours, or overnight for best flavor and texture.
- Step 4: Make the Whipped Cream (Optional) : In a cold mixing bowl, beat heavy cream, powdered sugar, and vanilla extract until soft peaks form. Spread or pipe the whipped cream over the chilled pudding.
- Step 5: Serve : Garnish with crushed vanilla wafers, banana slices, or a sprinkle of cinnamon just before serving. Serve cold and enjoy the creamy layers!