
10 People
20 mins
10 mins
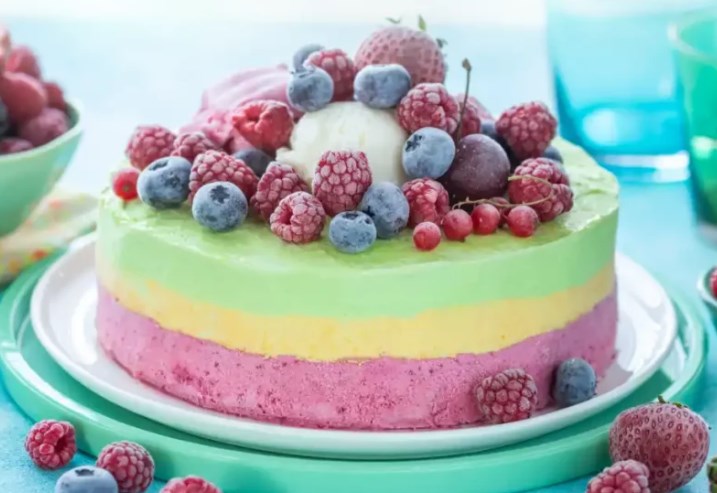
When I think of colorful desserts, the Rainbow Ice Cream Cake stands out as an ultimate showstopper. This cake is not just a treat for your taste buds but also a feast for the eyes. It’s perfect for birthday parties, family gatherings, or any celebration.
The vibrant layers of ice cream create a visual spectacle that is almost too pretty to eat, yet you won’t be able to resist its charm!
Making this cake involves layering different flavors of ice cream in a cake mold, which gives it that beautiful rainbow effect. Each slice showcases the beautiful hues, from bright reds and yellows to rich blues and greens. It’s truly an impressive dessert that never fails to impress guests and is always a hit with children, who get excited by the colorful layers!
This cake is also easy to assemble, allowing even novice bakers to shine. The best part? You can customize the flavors and colors based on your preference!
Whether you prefer fruity flavors like strawberry and mango or classic options like chocolate and vanilla, the possibilities are endless.
Why You’ll Love This Recipe
The Rainbow Ice Cream Cake is not just visually appealing; it’s incredibly versatile as well. Here are a few reasons it will become a favorite:
- Simple Preparation: With no baking required and minimal steps, it’s perfect for anyone.
- Customizable Flavors: You can recreate a version that reflects your tastes and party theme.
- Fruity Freshness: Adding berries on top enhances its appeal with a burst of color and flavor.
- Fun for Kids: Kids love it! Its vibrant colors and variety of flavors make it exciting.
- Impressive Presentation: It’s an eye-catching dessert that will amaze your guests.
The Appeal of Rainbow Ice Cream Cake
The appeal of the Rainbow Ice Cream Cake lies in its visual impact and delightful flavors. It’s a perfect way to celebrate special occasions with joy and cheer. The layers of ice cream allow for personal preference, as each person can enjoy their favorite flavors in every slice.
Moreover, it brings back childhood memories for many—who can forget the joy of having ice cream as part of a celebratory dessert? This cake not only satisfies the need for sweetness but also rekindles nostalgia, making it a go-to dessert for all ages.
Recipe Summary
This Rainbow Ice Cream Cake is easy to make, and following the steps ensures you achieve that stunning effect with little effort. You can mix and match ice cream flavors according to your preference. For the best presentation, I recommend a simple frosting and fresh berries on top. Scroll down for the detailed recipe!
Nutritional Information
The Rainbow Ice Cream Cake, while indulgent, offers a delightful balance of flavors. A typical slice contains a variety of ice cream flavors and toppings. Here’s a general breakdown of the nutritional content per slice:
- Calories: Approximately 350-400 calories, depending on the ice cream used.
- Fat: About 20 grams, primarily from the cream in the ice cream.
- Carbohydrates: Roughly 40 grams, providing that satisfying sweetness.
- Protein: 5-7 grams, thanks to the milk content in the ice cream.
- Sugar: A sweet treat, with around 30 grams of sugar per slice.
For those seeking a lighter option, consider using low-fat or non-dairy ice creams, which can alter the calorie count and provide different flavor profiles.
Ingredients Overview
To make this radiant cake, you’ll need the following ingredients:
- Ice Cream: Choose a mix of your favorite flavors, such as strawberry, vanilla, and blue raspberry.
- Cake Base: Use your preferred cake as a bottom layer, either a sponge or cookie crust.
- Whipped Cream: For frosting the top, use sweetened whipped cream for that fluffy finish.
- Fresh Berries: Strawberries, blueberries, and raspberries serve as a vibrant garnish.
- Food Coloring: If desired, to enhance the colors of your layers, food coloring can be added to the ice cream.
How to Make Rainbow Ice Cream Cake
Follow these steps to create your Rainbow Ice Cream Cake:
- Prepare the Cake Base: Start by baking your cake or preparing your cookie crust. Let it cool completely.
- Layer the Ice Cream: Allow each flavor of ice cream to soften for easier spreading. Layer each flavor on top of the cake base, smoothing it down as you go.
- Freeze: Cover with plastic wrap and freeze until firm, at least 4 hours or overnight.
- Frost: Once firm, spread whipped cream on top of the cake for a fluffy finish.
- Decorate: Top with fresh berries and if you like, drizzle some sauce for extra flavor.
- Serve: Slice into wedges and enjoy the colorful layers!
Ingredients
1 pint raspberry ice cream
1 pint lemon ice cream
1 pint mint chocolate chip ice cream
1 pint vanilla ice cream
To taste fresh berries (raspberries, blueberries, strawberries) For topping
Directions
- Prepare the cake pan by lining it with plastic wrap, allowing some overhang to make removing the cake easier.
- Start with the raspberry ice cream. Let it sit at room temperature for about 10 minutes for easier spreading. Once softened, spread the raspberry ice cream evenly into the bottom of the prepared cake pan. Smooth the top with a spatula and freeze for 30 minutes.
- Next, repeat with the lemon ice cream layer. Allow it to soften, spread over the frozen raspberry layer, and smooth the top. Freeze for another 30 minutes.
- Afterward, add the mint chocolate chip layer. Soften and spread it over the lemon layer, smoothing it out before freezing for another 30 minutes.
- Finally, add the vanilla ice cream as the last layer. After smoothing it out, freeze the entire cake for at least 4 hours or until fully firm.
- To serve, carefully lift the cake out of the pan using the plastic wrap. Place it on a serving plate and top with assorted fresh berries.
- Slice and enjoy your colorful masterpiece!
Expert Tips for Making the Best Ice Cream Cake
- Softened Ice Cream: Make sure your ice cream is slightly softened before layering; this makes for easier spreading.
- Firm Freezing: The longer the cake freezes, the better the layers hold together. Don’t skimp on freezing time!
- Use a Springform Pan: This allows for easy release and a beautiful presentation.
- Flavor Variation: Don’t hesitate to mix and match flavors, even introduce unique ones like salted caramel for variety.
Serving Suggestions
This cake is best served fresh after slicing. Pair it with a scoop of your favorite ice cream or a warm dessert sauce if desired. A light fruit salad could complement the richness while enhancing the cake’s vibrancy.
Variations and Substitutions
Feel free to customize this cake to suit your taste or dietary needs. Here are a few ideas:
- Vegan Option: Opt for dairy-free ice cream and plant-based whipped cream.
- Gluten-Free Layer: Use gluten-free cookies for the crust or choose a gluten-free cake mix.
- Different Themes: Create an ombre effect with nuanced shades of a single color for a different look.
Storing and Reheating
This Rainbow Ice Cream Cake should be covered and stored in the freezer for optimal freshness. While it can last a couple of weeks, it’s best enjoyed within a week for the best texture and flavor. Avoid letting it thaw too much before serving, as the layers can start to separate.
FAQ
Q: Can I use store-bought ice cream?
A: Yes, store-bought ice cream works perfectly for this cake!
Q: How long can I keep the cake in the freezer?
A: The cake is best if consumed within a week, but it can last for up to two weeks.
Q: Can I use non-dairy ice cream?
A: Absolutely! Non-dairy ice creams can be used for a dairy-free version.
Q: What can I use instead of whipped cream?
A: For a lighter option, consider using a yogurt-based topping or coconut whipped cream.
Q: How do I prevent the ice cream from melting too quickly?
A: Keep the cake in the freezer until you’re ready to serve it, and slice it quickly for best results.
Rainbow Ice Cream Cake Recipe
Course: Desserts10
servings20
minutes10
minutes30
minutesIngredients
1 pint raspberry ice cream
1 pint lemon ice cream
1 pint mint chocolate chip ice cream
1 pint vanilla ice cream
To taste fresh berries (raspberries, blueberries, strawberries) For topping
Directions
- Prepare the cake pan by lining it with plastic wrap, allowing some overhang to make removing the cake easier.
- Start with the raspberry ice cream. Let it sit at room temperature for about 10 minutes for easier spreading. Once softened, spread the raspberry ice cream evenly into the bottom of the prepared cake pan. Smooth the top with a spatula and freeze for 30 minutes.
- Next, repeat with the lemon ice cream layer. Allow it to soften, spread over the frozen raspberry layer, and smooth the top. Freeze for another 30 minutes.
- Afterward, add the mint chocolate chip layer. Soften and spread it over the lemon layer, smoothing it out before freezing for another 30 minutes.
- Finally, add the vanilla ice cream as the last layer. After smoothing it out, freeze the entire cake for at least 4 hours or until fully firm.
- To serve, carefully lift the cake out of the pan using the plastic wrap. Place it on a serving plate and top with assorted fresh berries.
- Slice and enjoy your colorful masterpiece!