
Introduction
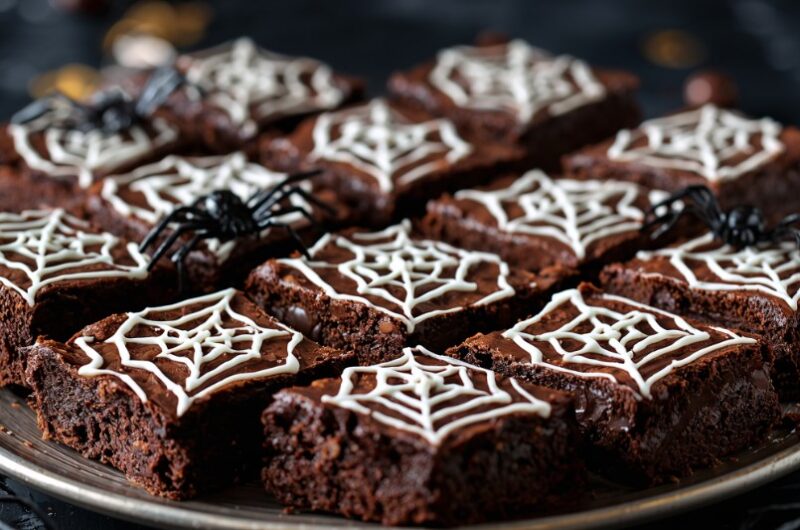
When Halloween rolls around, it’s the perfect time to transform everyday desserts into something a little creepy, fun, and festive. Spooky Spider Web Brownies are rich, fudgy brownies topped with a striking spider web design made from white chocolate or icing. They’re not just delicious, but also eye-catching, making them the star of any Halloween party table.
What makes them so special is how simple they are to decorate while still looking impressive. Even if you don’t have advanced baking or decorating skills, you can achieve a dramatic spider web effect in minutes. It’s the kind of dessert that delivers both on taste and presentation—a true Halloween winner.
Why I Love This Recipe
I love this recipe because it blends classic comfort food with festive creativity. Brownies are already one of my favorite desserts—dense, chocolatey, and perfectly chewy. Adding the spider web design makes them seasonal and fun without being overly complicated. It’s a treat both kids and adults adore: kids love the spooky web, while adults can’t resist the decadent chocolate flavor.
It’s also a versatile recipe—you can make it from scratch for a homemade touch or use a boxed brownie mix if you’re short on time. Either way, the results are delightful.
Why It’s a Must-Try Dish
This recipe is a must-try because:
- It’s festive and spooky—perfect for Halloween parties or school events.
- It’s decadent, fudgy, and full of chocolate goodness.
- It’s easy to make with minimal decorating skills required.
- It’s a crowd-pleaser for both kids and adults.
- It’s Instagram-worthy and looks like you spent hours baking.
Recipe Information
- Preparation Time: 15 minutes
- Cooking Time: 30 minutes
- Total Time: 45 minutes
- Servings: 16 brownies
- Calories per serving: ~230 kcal (approximate)
- Course: Dessert / Sweet Treat
- Cuisine: American
Ingredients
For the Brownies:
- 1 cup (2 sticks) unsalted butter, melted
- 2 cups granulated sugar
- 4 large eggs
- 1 tsp vanilla extract
- 1 cup all-purpose flour
- 1 cup unsweetened cocoa powder
- ½ tsp salt
- 1 cup semi-sweet chocolate chips (optional for extra fudginess)
For the Spider Web Topping:
- ½ cup white chocolate chips (or white candy melts)
- 1–2 tsp vegetable oil (for melting)
- Optional: plastic spider rings or edible spider decorations for garnish
Step-by-Step Preparation Method
Step 1: Make the Brownie Batter
- Preheat oven to 350°F (175°C). Grease or line a 9×13-inch baking pan with parchment paper.
- In a large bowl, whisk together melted butter and sugar until smooth.
- Add eggs and vanilla extract, whisking until combined.
- In a separate bowl, sift together flour, cocoa powder, and salt.
- Gradually fold dry ingredients into the wet mixture until just combined.
- Stir in chocolate chips if using.
Step 2: Bake the Brownies
- Spread the batter evenly in the prepared baking pan.
- Bake for 28–32 minutes, or until a toothpick inserted in the center comes out with moist crumbs (not wet batter).
- Allow brownies to cool completely in the pan before decorating.
Step 3: Make the Spider Web Design
- Melt white chocolate chips with vegetable oil in the microwave (30-second bursts, stirring between) until smooth.
- Transfer melted chocolate to a piping bag (or a small ziplock bag with the tip cut off).
- Starting in the center of the brownie pan, pipe three concentric circles.
- Using a toothpick, drag lines outward from the center to the edges, creating a web effect.
- Let the topping set for about 15 minutes.
Step 4: Slice and Serve
- Cut brownies into squares or rectangles.
- Optional: Add plastic spider rings or edible spiders on top for a spooky finish.
How to Serve
- Arrange on a Halloween platter surrounded by candy corn or gummy spiders.
- Serve with a scoop of vanilla ice cream for an indulgent dessert.
- Wrap individually for trick-or-treat giveaways or school party snacks.
Recipe Tips
- Don’t overbake the brownies—pull them out when slightly underdone for maximum fudginess.
- Use candy melts instead of white chocolate for easier melting and piping.
- Chill the brownies before cutting for neat, sharp edges.
- For extra Halloween fun, use orange or green candy melts for the web design.
Variations
- Box Mix Shortcut: Use a boxed brownie mix for a quick version—decorate the same way.
- Peanut Butter Webs: Pipe peanut butter frosting instead of white chocolate for a nutty twist.
- Gluten-Free Version: Substitute gluten-free all-purpose flour blend.
- Cheesecake Spider Web Brownies: Swirl cream cheese batter into the brownie base before baking, then decorate with the web.
- Double Chocolate: Add dark chocolate chunks along with chips for intense flavor.
Freezing & Storage
- Room Temperature: Store in an airtight container for 3–4 days.
- Refrigerator: Keeps fresh for up to 1 week.
- Freezer: Wrap individually in plastic wrap, place in freezer bags, and freeze for up to 3 months. Thaw at room temperature before serving.
Special Equipment Needed
- 9×13-inch baking pan
- Mixing bowls
- Whisk and spatula
- Parchment paper
- Microwave-safe bowl
- Piping bag or ziplock bag
- Toothpick (for web design)
FAQ
Q1: Can I use dark chocolate instead of white for the web?
Yes! For a creepier look, try orange candy melts on dark brownies, or even neon green.
Q2: My web design smudged—what went wrong?
The brownies may have been too warm. Always cool completely before decorating.
Q3: Can I make these ahead of time?
Yes! Bake the brownies a day ahead, then decorate on the day you plan to serve.
Q4: Can I make them in individual cupcake liners?
Yes—bake in a muffin tin for spider web brownie bites.
Q5: Are these safe for nut allergies?
Yes, if you skip chocolate chips made in nut facilities and avoid peanut butter variations.
Conclusion
Spooky Spider Web Brownies are the ultimate Halloween treat—rich, chewy, and decadently chocolatey, with a striking spider web decoration that makes them festive and fun. They’re simple to bake, easy to decorate, and perfect for parties, family gatherings, or just enjoying with a hot drink on a cool autumn night. Both spooky and sweet, these brownies are guaranteed to become a Halloween tradition in your home.
Spooky Spider Web Brownies
Course: DessertsCuisine: AmericanDifficulty: easy16
servings15
minutes30
minutes45
minutesIngredients
For the Brownies:
1 cup (2 sticks) unsalted butter, melted
2 cups granulated sugar
4 large eggs
1 tsp vanilla extract
1 cup all-purpose flour
1 cup unsweetened cocoa powder
½ tsp salt
1 cup semi-sweet chocolate chips (optional for extra fudginess)
For the Spider Web Topping:
½ cup white chocolate chips (or white candy melts)
1–2 tsp vegetable oil (for melting)
Optional: plastic spider rings or edible spider decorations for garnish
Directions
- Step 1: Make the Brownie Batter: Preheat oven to 350°F (175°C). Grease or line a 9×13-inch baking pan with parchment paper. In a large bowl, whisk together melted butter and sugar until smooth. Add eggs and vanilla extract, whisking until combined. In a separate bowl, sift together flour, cocoa powder, and salt. Gradually fold dry ingredients into the wet mixture until just combined. Stir in chocolate chips if using.
- Step 2: Bake the Brownies: Spread the batter evenly in the prepared baking pan. Bake for 28–32 minutes, or until a toothpick inserted in the center comes out with moist crumbs (not wet batter). Allow brownies to cool completely in the pan before decorating.
- Step 3: Make the Spider Web Design: Melt white chocolate chips with vegetable oil in the microwave (30-second bursts, stirring between) until smooth. Transfer melted chocolate to a piping bag (or a small ziplock bag with the tip cut off). Starting in the center of the brownie pan, pipe three concentric circles. Using a toothpick, drag lines outward from the center to the edges, creating a web effect. Let the topping set for about 15 minutes.
- Step 4: Slice and Serve: Cut brownies into squares or rectangles. Optional: Add plastic spider rings or edible spiders on top for a spooky finish.